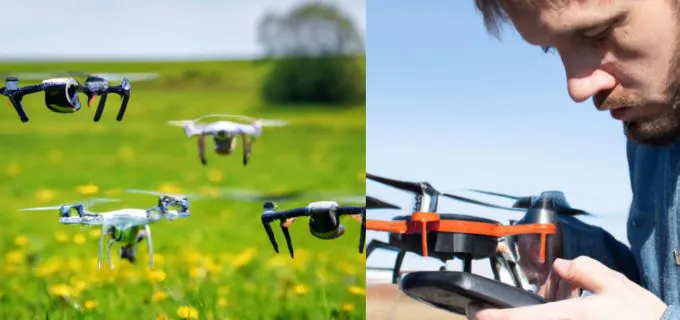
It can be frustrating and dangerous if your drone does not fly straight and level. Fortunately, trimming your drone can help correct any imbalances or deviations in its flight and improve its overall stability.
However, not all drones have these smart flying features, and they can sometimes cause drifting or instability during flight. It can be frustrating for pilots and even pose a safety risk.
How to Trim a Drone
Trimming a drone involves adjusting its control surfaces to balance it and achieve a stable flight, an essential skill for any drone pilot. In this guide, we will walk you through trimming your drone, from its basics to the step-by-step instructions for calibrating your drone and adjusting its trim settings.
Do All Drones Have Trim?
Not all drones have trim settings. It is typically found on cheaper drones lacking advanced features such as GPS or obstacle avoidance. However, even the most sophisticated drones sometimes require trimming to achieve a stable flight. Trimming involves adjusting the drone’s control surfaces to balance and ensure it flies straight and level. It’s an essential skill for any drone pilot, and even if your drone doesn’t have a trim function, it’s worth understanding the basics of trimming to ensure a safe and stable flight.
Why is my drone Drifting
If your drone drifts off course during flight, it can be frustrating and potentially dangerous.
Trimming your drone is the process of adjusting the drone’s control surfaces to balance it and make it fly straight and level. Calibration, on the other hand, is the process of ensuring that the drone’s sensors and components are functioning correctly and accurately.
If your drone is drifting, one possibility is that it has not been properly trimmed or calibrated. Without proper trimming, the drone may not be able to maintain a stable position in the air and may drift off course. Similarly, if the drone’s sensors or components are not calibrated correctly, it may not be able to accurately detect its position or orientation, leading to drifting.
Other factors may be at play if your drone drifts even after trimming and calibration. It’s important to check for any damage or malfunctions in the drone’s components, such as a damaged motor or faulty GPS. External factors such as wind or electromagnetic interference can also cause drifting.
What is trim on a drone?
Trimming is an important aspect of drone piloting that involves adjusting the drone’s control surfaces to achieve a stable and level flight. Essentially, trim settings allow you to balance the drone and adjust for any slight deviations or imbalances that may affect its flight.
When a drone is trimmed properly, it can fly straight and level without any additional input from the pilot. It can enhance its control and reduce the likelihood of accidents or crashes.
In summary, trimming is adjusting a drone’s control surfaces to balance it and achieve a stable and level flight. It is an important aspect of drone piloting common in most consumer drones, regardless of their price point. While some drones may have advanced sensors and autonomous features, trimming is still necessary to fine-tune their flight performance and maintain a safe and stable flight.
What is calibrate
Calibration involves verifying that the sensors and components of a drone are operating properly and providing precise readings. This process involves adjusting or setting the drone’s various sensors and components to their correct values or positions.
Calibration is essential for the drone to operate correctly and respond accurately to the pilot’s inputs. Without proper calibration, the drone’s sensors may provide incorrect data, leading to errors in its flight performance.
How to Trim a Drone- Complete Process
1. Preparing to Trim Your Drone
Before you start trimming your drone, there are a few things you need to do to prepare. Here are some important steps to take:
A. Choose the right location
Selecting an appropriate location is crucial for a successful drone trimming session. It is imperative to identify a spacious, obstacle-free area with no nearby trees or buildings. Ensure no people or animals are around, as drones can be dangerous if not flown properly.
B. Check the drone battery
Ensure that your drone’s battery is fully charged before commencing the trimming process. This will ensure you have enough flight time to complete the trimming process without interruptions.
C. Calibration of drone sensors
Calibration of the drone sensors is essential before you start trimming. This process involves setting the drone’s gyroscopes and accelerometers to neutral positions. Calibration ensures that the drone’s flight controls work correctly and respond accurately to your commands.
D. Set up the remote control
Before you take off, make sure your drone remote control is properly configured. Check that the sticks and switches are working correctly and that you have a clear view of the display screen.
By taking these steps, you will be ready to start confidently trimming your drone.
2. Understanding the Axes of a Drone
The trim buttons are typically on the remote control pad around the joysticks used to manoeuvre the drone. Understanding the various axes of movement is essential for correctly trimming a drone. A drone can move along three axes: pitch, roll, and yaw.

2.1 Introduction to the axes
The pitch axis controls the drone’s forward and backward movement. The roll axis controls the drone’s side-to-side movement. The yaw axis controls the drone’s rotation.
2.2 Pitch axis
If you observe your drone drifting forward or backwards, it is necessary to adjust the pitch trim button. To trim the pitch axis, you need to adjust the drone’s nose up or down. Adjusting the pitch trim button will impact the drone’s forward and backward movement.
2.3 Roll axis
You need to adjust the drone’s wings up or down to trim the roll axis. This will affect the drone’s side-to-side movement. The roll trim button is used when the drone drifts left or right. For instance, if you observe the drone drifting towards the left, you must adjust the roll trim button to the right.
2.4 Yaw axis
You need to adjust the drone’s rotation to trim the yaw axis. This will affect the drone’s turning ability.
Understanding these axes is crucial to trimming your drone correctly. Now let’s move on to the actual trimming process.
3. Trimming a Drone
Trimming a drone involves adjusting the flight controls to ensure that the drone flies straight and level. Here are the basic steps to trim a drone:
3.1 Basic steps to trim a drone
- Take off and hover the drone at eye level.
- Observe the drone’s movements and identify which axis needs adjustment.
- Adjust the appropriate control stick or switch until the drone flies straight and level.
- Repeat the process for each axis until the drone flies smoothly and is properly trimmed.
3.2 Trimming pitch axis
To trim the pitch axis:
- Make small adjustments to the left stick on your remote control. If the drone is tilting forward, push the stick backward.
- If the drone is tilting backward, push the stick forward.
- Make small adjustments until the drone remains level.
C. Trimming roll axis
Make small adjustments to the right stick on your remote control to trim the roll axis.
Move the stick to the right if the drone tilts towards the left. Conversely, if the drone is tilting towards the right, move the stick to the left.
Again, make small adjustments until the drone remains level.
D. Trimming yaw axis
Use your remote control’s left and right trim buttons to trim the yaw axis. Press the left trim button if the drone is rotating to the left and the right trim button if it is rotating to the right.
How to test your trim settings
After you have trimmed your drone, it’s important to test your settings. Here are some ways to do so:
Hover test: Hover the drone in place for a few seconds and observe its movements. If it drifts in any direction, make small adjustments to the appropriate control stick or switch until it remains in place.
Circle test: Fly the drone in a circle and observe its movements. If it drifts off course, adjust the appropriate control stick or switch until it flies in a smooth circle.
Figure-eight test: Fly the drone in a figure-eight pattern and observe its movements. If it tilts or drifts off course, makes small adjustments to the appropriate control stick or switch until it flies a smooth figure-eight.

Wind test: If you are flying your drone in windy conditions, observe its movements and adjust the appropriate control stick or switch to keep it flying straight and level.
Make small adjustments and test your settings afterward to ensure your drone is properly trimmed.
Troubleshooting Trimming Issues
You might face certain trimming issues despite adhering to the steps mentioned above. Here are some common trimming issues and how to troubleshoot them:
Drifting
If your drone drifts off course, adjust the appropriate control stick or switch to compensate for the drift. If the drone continues to drift, check for any wind or environmental factors affecting its flight.
Tilting
If your drone tilts to one side or the other, adjust the appropriate control stick or switch to level it out. If it continues to tilt, check for any damage to the drone or its components that may affect its flight.
Unstable flight
If your drone is unstable in flight, try recalibrating the drone’s sensors and retrimming it. If the issue persists, check for any damage or malfunctions in the drone’s components.
By troubleshooting these common trimming issues, you can ensure your drone is properly trimmed and ready for flight.
Why does my drone fly sideways?
If your drone is flying sideways, it could be due to several factors. Here are some possible reasons:
Wind:
The wind is one of the most common reasons why drones may fly sideways. If you’re flying in windy conditions, the wind can push the drone to one side, causing it to fly sideways.

Imbalanced propellers:
If the propellers are not balanced correctly, they can cause the drone to fly unevenly, possibly resulting in it flying sideways.
Calibration issues:
If the drone’s sensors are not calibrated correctly, they may not provide accurate readings, which can cause the drone to fly sideways. Make sure to calibrate the drone before each flight to ensure that its sensors are working correctly.
Trim settings:
If the drone’s trim settings are not adjusted correctly, it may be unable to fly straight and level. Check the drone’s trim settings and adjust them if necessary.
Motor issues:
If one or more of the drone’s motors are not functioning correctly, it can cause the drone to fly unevenly or sideways. Inspect the motors for signs of damage or wear, and replace them if needed.
It is crucial to identify and troubleshoot the root cause of the problem to avoid any potential crashes or further complications. By identifying the cause of the sideways flying, you can make the necessary adjustments or repairs to get your drone flying correctly again.
Frequently Asked Questions
The left and right trim adjusts the drone’s control surfaces to balance it and achieve a stable flight. If a drone drifts to the left or right, adjusting the left or right trim can help correct this.
Right trim refers to the adjustment made to the drone’s control surfaces to compensate for the drone drifting to the right. By adjusting the right trim, you can correct the drone’s flight path and keep it flying straight.
M2ost drones have a calibration feature built into the controller or a specialized app. Generally, the calibration process involves placing the drone on a level surface and following the manufacturer’s instructions to adjust or set the sensors and components to their correct values.
Trims adjust the drone’s control surfaces, such as the elevator, rudder, or ailerons, to balance it and achieve a stable flight. Trims work by altering the drone’s response to control inputs, allowing the pilot to compensate for any deviations or imbalances in the drone’s flight.
Trim aims to balance the drone and achieve a stable and level flight. Proper trimming allows the drone to fly straight and level without additional input from the pilot, making it easier to control and reducing the risk of accidents or crashes.
Conclusion
Trimming and calibrating your drone ensures a stable and safe flight. If you’re experiencing issues such as drifting, instability, or flying sideways, trimming and calibrating your drone can help resolve these problems.
This article explained the trimming process and outlined the steps to calibrate your drone correctly.
Even if you have an older drone without smart flying features, don’t worry; you can still improve its stability and accuracy by following the steps outlined in this guide. Remember to regularly calibrate your drone before each flight and adjust the trim settings to achieve a stable flight. With practice and patience, you can master the art of trimming and calibration and enjoy safe and smooth flights every time.

